📑 What’s in this article
-
Guide Builder (Workspace)
Learn how to create and manage guides directly within the IrisCX platform UI. -
Bulk Guide Import (Upload)
Use a CSV template to create longer guides or multiple guides efficiently.
🛠️ Guide Builder (Workspace)
Use this method to build and edit guides directly inside the IrisCX platform — ideal for short to medium-length guides or when you want more visual control during setup.
📝 Creating Guides in IrisCX - Watch Video

Steps to Create a Guide in the Workspace:
-
Go to Workspace Settings
Navigate to your Workspace, then click on General Settings. -
Access the Guides Section
Scroll down to find the Guides panel. Here you'll see a full library of all existing guides. -
Create a New Guide
Click the Create New Guide button at the bottom of the section. -
Enter Guide Details
-
Title: Give your guide a clear, descriptive name.
-
Self-Guided Toggle: Enable this if the guide will be used for one-way video experiences like on-site inspections or self-guided flows.
-
-
Configure Questions
-
Question Title: This is the main prompt the user sees — displayed prominently.
-
Description/Instructions: Use this field to provide additional guidance, like:
-
“Is the unit powered on?”
-
“What is the temperature reading?”
-
“Take a photo of the issue.”
-
-
-
Insert Dynamic Tokens (Optional)
Personalize the experience with:-
Customer tokens – e.g., the homeowner in a two-way video session
-
Expert tokens – e.g., the technician or representative
Paste the appropriate token directly into the text field. Iris will replace it dynamically in the live experience.
-
-
Attach Media (Optional)
You can include images, audio, or video to enrich your questions:-
Select the media type
-
Click Choose File to upload
-
A preview will appear in the editor
-
-
Set Actions for Completed Steps
When a questions is marked as completed in a live call, Iris can trigger additional automated actions:-
✅ Create a bookmark – Think of these as tags or milestones for reviewing calls later
-
📸 Take an automated photo – (A screenshot will be taken on the Expert side when the step is completed)
-
🚫 No action – Simply complete the step with no additional automation
-
-
Add or Remove Questions
-
Click ➕ to add a new question
-
Click 🗑️ (Trash Can) to delete an existing one
-
-
Save Your Guide
Click Save, and you'll return to the main Guides section.
📥 Bulk Guide Import (Upload)
The Bulk Guide Import method lets you create one or more guides using a pre-formatted CSV spreadsheet. This method is ideal for longer guides or when drafting outside of the IrisCX UI.
How to Use the CSV Template:
-
Download the CSV File
-
Go to the Guides section in your workspace and select Download CSV.
-
Note: the export will contain a summary of your existing guides if any are configured.
-
-
Understand the Key Columns
You’ll primarily be working with six columns:-
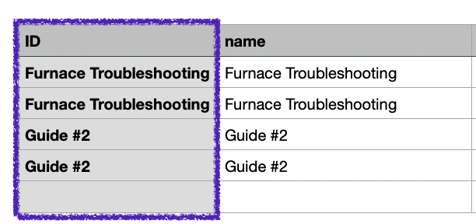
Name: Title of the guide (e.g., Furnace Troubleshooting)
-
Question: Title of the question to be shown to the end user
-
Order: The order each question should appear in
-
Description: Additional instructions or context for the step
-
Action: Must include one of the following options:
-
Do Nothing -
Add Bookmark -
Take Screenshot
-
-
Tags (optional): Keywords for filtering or tagging steps (e.g., maintenance, safety)
-

Unique Fields to Populate
-
-
ID: Copy the guide name here — the system will auto-generate a unique value later
-
Public Visible and Public Enabled Description columns should always be set to False

Create Multiple Guides on One Sheet
-
-
To add more than one guide, group rows by guide name

-
- Save and Upload Your File
-
-
Save the file in
.csvformat -
Return to IrisCX → Guides section → Click Upload CSV
-
Once uploaded, your new guide(s) will appear in the list
-