NOTE: AVAILABLE FOR ADMIN AND MANAGER USERS IN IRISCX
With automation, you can instantly receive notifications about the important things you want to know about – things like client-side exceptions, CSAT scores, join notifications, completed sessions and more.
When set up, your automation will look something like the image below. Find a more detailed list of the terminology used in our automation engine; view our article "What is IrisCX Workflow Automation?"
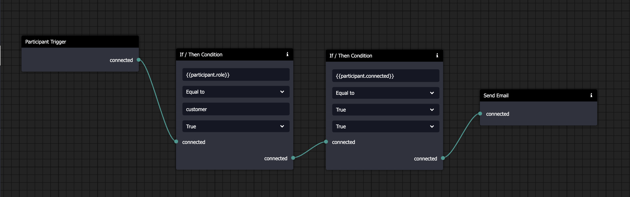
Table of Contents
- Step 1: Create New Automation
- Step 2: Set up a Trigger Step
- Step 3: Set up Middle Steps
- Step 4: Set up an End Step
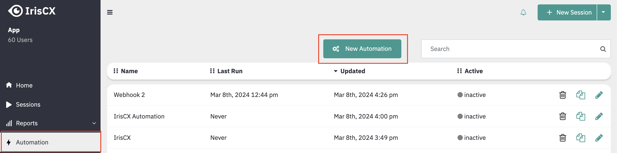
Step 1: Create New Automation
To start, navigate to the Automation tab in your workspace menu and click on the ‘New Automation’ button in the top right corner.
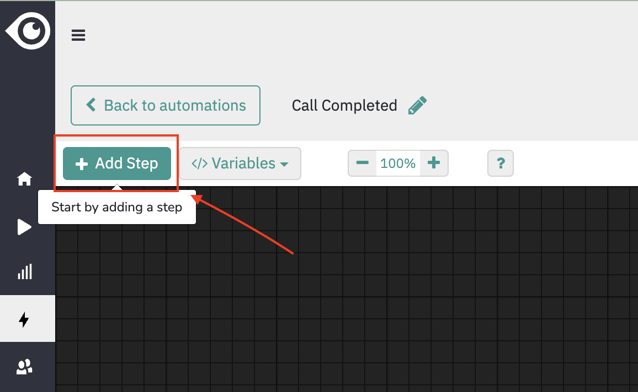
Step 2: Setting up a Trigger
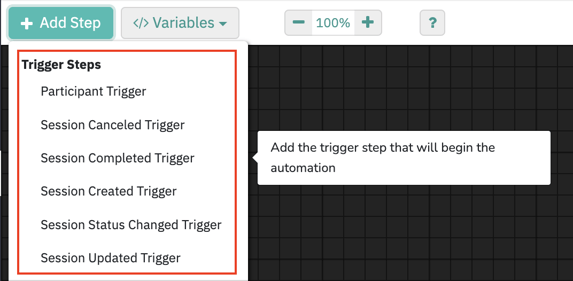
Click on the ‘Add Step’ button in the top left corner to set up your first step.
A menu will drop down with six available trigger steps. The trigger you choose will dictate which action will start the automation process. That action could be one of six things: a participant joined the session, a session was canceled, a session was completed, a new session was created, a session’s status has changed, or a session's attributes have been updated.
Choosing one of these enables you to kick off a notification and review process depending on the parameters you set up in the next step.
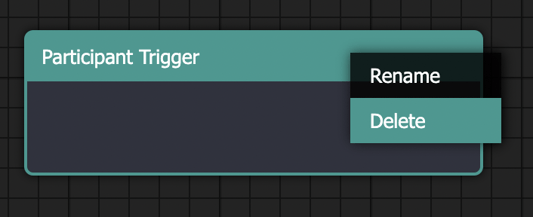
NOTE: After you add your trigger step, you’ll notice all of the trigger steps will be greyed out in the menu. If you made the wrong choice and need to delete a step, right-click on the header bar and click Delete.
Step 3: Set up Middle Steps
The middle steps in your automation will determine how and when your automation will continue. Learn more about each of these automation terminologies in this article.

Here is an example of automation in practice:
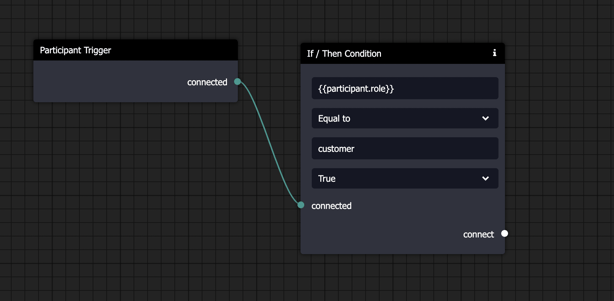
If you want it to move forward based on certain conditions, you’ll select ‘If / Then Condition,’ and link the steps together by clicking on the white dot (output) and connecting it to the white dot on the next step (input). They will say connected when they successfully connect.
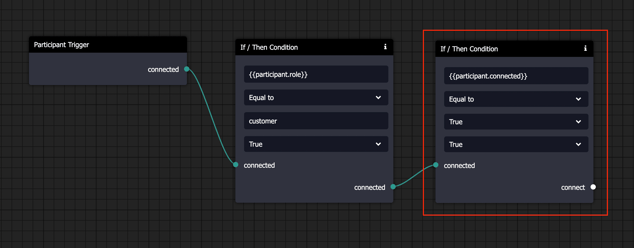
You can also add a second set of rules by grabbing a second If/Then Condition step and connecting it to the previous If/ Then Condition step. In the example below, the second condition states that connected status of the participant must equal True. This means that the system should only send an alert if the customer successfully connected into the call.
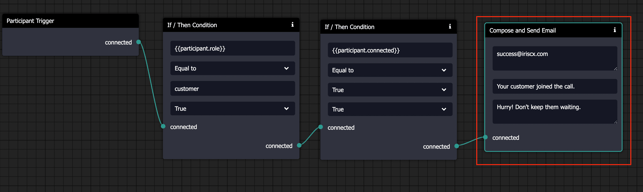
From here, you can set up the email that will be sent to notify your team member(s) of this condition being met. Navigate to the 'Add Step' dropdown and select 'Compose and Send Email'. Enter the recipient's email address, text in the subject line, and body of the email.
Step 4: Set an End Step
You will need to add an end step to conclude the automation and ensure the action you are setting up will happen as needed. Your options are to 'Send Email', 'Set Session Status', 'Compose and Send Email', and 'Webhook'.
Following the example above, we will send an email notification by selecting ‘Compose and Send Email' from the 'Add Step' dropdown menu.
As a final step, ensure that you've connected all of the output/inputs to complete the automation.
Turn the Active toggle ON from the top right and corner to activate the automation.
Congratulations! You have learned how to set up your first workflow automation!
There is a wide range of conditions that you can track using workflow automation, and we recommend meeting with your Customer Success Manager to determine what would work best for your business goals.
Reach out to them directly or email support@iriscx.com.